- Print picture on KODAK Picture Kiosk using the mini-prints feature.
- Cut photos into strips.
- Form loop with photo and tape. Continue to create loops with photos, joining them together.
- Print photos on the KODAK Picture Kiosk.
- Glue card to lid.
- Gather favorite pictures.
- Make prints at a KODAK Picture Kiosk.
- Twist wire around pine cone.
- Make a loop similar to a paper clip at the top of the wire to hold the photo.
- Print photos on KODAK Picture Kiosk using the mini-prints feature.
- Using jar lid as a guide, cut the photo to fit.
- Glue photo to lid.
- Glue ribbon to top.TIP: Customize your ornaments further by painting the lid with chalkboard paint and chalking on a holiday greeting.
- Print photos on the KODAK Picture Kiosk.
- Position photo on lid and trace edge.
- Cut photo slightly smaller than lid.
- Glue photo to lid.
- Glue magnet to back.
- Print photos on the KODAK Picture Kiosk.
- Cut and fold card stock.
- Cut photos to fit.
- Glue photos to each panel.
- Fold closed and tie with ribbon.TIP: Use the mini-prints option on the KODAK Picture Kiosk for smaller photos.
- Take pictures with children spelling out “Noel”.
- Print pictures on KODAK Picture Kiosk.
- Insert pictures in frames.
- Glue the frames together into a quadrant.
- Staple or nail ribbon to the back of frames
- Hang with ribbon.
TIPS:
- Print your pictures in black-and-white or sepia for a different look.
- Substitute picture hanging wire for the ribbon for a more contemporary look.
- Cut out the feltCut the felt pieces into the shape of a stocking.
- Print your photosGather photos of your family and friends. You can have your pictures created on a KODAK Picture Kiosk.
- Add your photo to the feltMake circle cutouts in the felt and glue photos on the inside so that the pictures are visible through the holes in the stocking.
- Add embellishmentsAdd cording, bells, and tassels and embellish with sequins and beads to have an elegant-holiday keepsake.
- Print your pictures using the Kodak Moments App or the KODAK Picture Kiosk.
- Print a downloadable Advent Calendar Template – this one from jhilldesign.com
- Cut open windows on three sides with an Exacto knife (you can also use a coupon cutter or the point on a pair of scissors).
- Cut the pictures to fit the window size and glue to the template.
- Glue the house page over the top of the pictures page lining them up carefully. TIP: Pull back the flaps to make sure the pictures line up with the windows.
- Give it to someone you love to enjoy starting December 1st.
- Print photos on the KODAK Picture Kiosk or the My KODAK MOMENTS App.
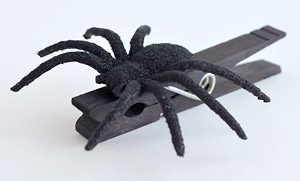
- Paint clothes pins black and let dry.
- Glue spiders to clothes pins (supervise young children using glue gun).

- Insert photo.